
Footography, the art of capturing captivating images of feet, has gained significant popularity in recent years. This niche in photography allows creatives to experiment with angles, lighting, and poses, offering a unique perspective on the human form. Whether you’re a professional photographer or just someone looking to explore a creative hobby, footography can bring out your artistic side. In this article, we’ll dive into everything you need to know to master foot photography and take your foot shots to the next level.
Footography is the art and technique of capturing creative photographs of feet, often focusing on form, movement, and aesthetics.
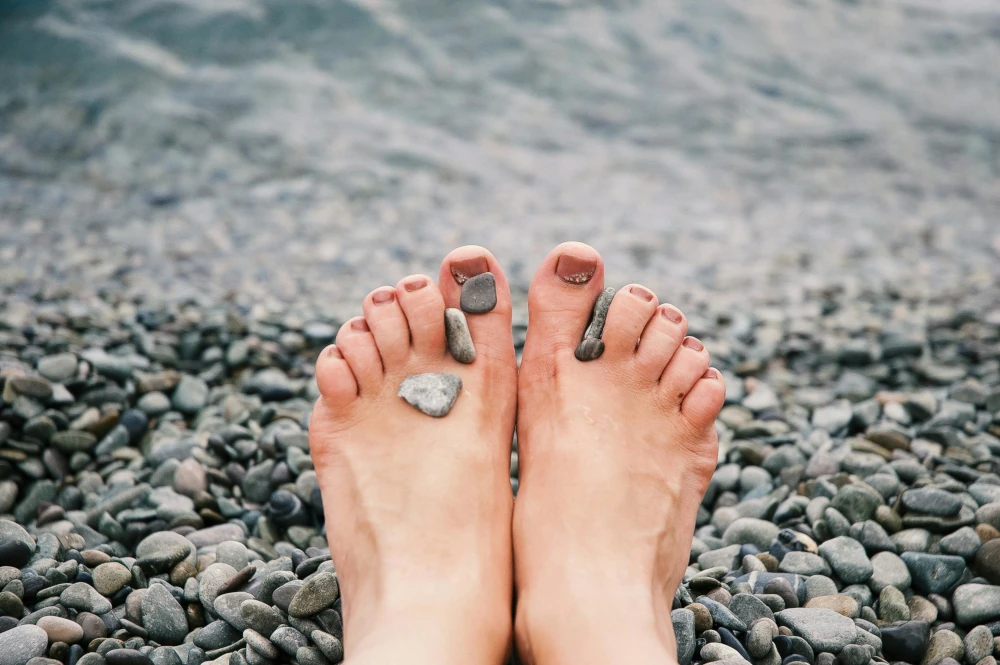
What is Footography?
Footography is essentially the art of photographing feet, often focusing on the unique details of the feet, including toes, arches, and soles. This niche branch of photography can range from fashion shots to artistic expressions, often capturing feet in striking poses or natural settings. Whether in close-up or wide shots, footography emphasizes the beauty, texture, and shape of feet in a way that regular photography doesn’t always highlight.
Why Footography is Gaining Popularity
Footography has become a significant form of creative expression for many photographers. It’s used in various industries, including fashion, advertising, and social media. Models and foot photographers alike use this art form to tell stories, create eye-catching visuals, and even explore body positivity and identity. Additionally, foot photography is growing on platforms like Instagram, where visually stimulating content often goes viral. This makes it an exciting and emerging niche for photographers to dive into.
Essential Foot Photography Equipment

To get started with footography, it’s important to have the right gear to achieve high-quality results. Here’s a breakdown of the essential foot photography equipment:
1. Camera
A DSLR or mirrorless camera with manual settings is ideal for foot photography. A full-frame camera like the Canon EOS 5D Mark IV or Sony A7R IV can provide sharp detail and clarity for close-up foot shots. For beginners, a good entry-level camera like the Canon EOS Rebel series or the Nikon D3500 will also suffice.
2. Lenses
The lens you choose plays a crucial role in capturing detailed foot images. A macro lens (such as the Canon EF 100mm f/2.8L or the Nikon 105mm f/2.8) is perfect for close-up shots. It allows you to focus on the intricate details of the feet, like texture and skin.
3. Lighting
Lighting is one of the most important aspects of footography. Natural light can be ideal for creating soft, flattering photos, especially if you’re shooting outdoors. However, artificial light sources like softboxes or ring lights are often used for controlled studio environments. Experiment with side lighting to highlight the curves and texture of the feet, or use backlighting for a dramatic effect.
4. Tripod
A tripod is crucial for steady shots, especially if you plan to take close-ups or long exposures. It will also help you maintain consistency in your angles.
Best Poses for Foot Photography
Posing feet creatively is key to making footography shots stand out. Below are some poses and tips to help you get started:
1. Feet in Motion
Capturing feet in motion adds a dynamic element to your shots. A shot of a foot mid-step can evoke a sense of freedom or energy. Consider shooting a model walking on a beach or running through a field for this type of shot.
2. Symmetry and Lines
Feet positioned symmetrically can create visually appealing compositions. Try aligning both feet in a way that the toes or arches form lines, either parallel or diagonal, to give the image structure and depth.
3. Close-Ups and Detail Shots
Focus on the texture and detail of the feet, such as the arches, toes, or soles. The sharpness of the image can emphasize the natural beauty of the feet, which is a hallmark of great foot photography.
4. Natural and Relaxed Poses
Sometimes the most beautiful foot shots are the simplest. Have your model sit or lie down in a relaxed position, allowing the feet to fall naturally. This is especially effective for capturing the curves and shapes of the feet in a gentle, unforced way.
Footography Lighting Techniques
The right lighting can elevate your foot photography to new heights. Here are some essential footography lighting tips:
1. Natural Lighting
Natural light from a window or during golden hour creates a soft, flattering look for foot photos. Position your subject near the light source, using the natural shadows to highlight the feet’s texture and form.
2. Softbox or Diffused Light
Using a softbox or a diffuser will help you create even lighting that eliminates harsh shadows, which is ideal for close-up shots. This lighting setup works well in studio environments, especially when you want the feet to be the focal point.
3. Backlighting
Backlighting is a powerful technique in footography. Position your light source behind the subject to create silhouettes or accentuate the details of the feet. This can add a dramatic effect to your photos.
Creative Ideas for Foot Photography
Footography doesn’t have to be limited to traditional poses. Here are some creative ideas to inspire your next shoot:
1. Outdoor Settings
Take your foot photography outdoors to capture feet on different surfaces such as sand, grass, or pavement. These natural textures can add an organic element to your photos and complement the foot’s appearance.
2. Play with Shadows
Use shadows creatively to highlight the contours of the feet. Shadows cast by feet can add depth, intrigue, and mood to your photos. Experiment with different light angles to achieve unique shadow effects.
3. Incorporate Props
Props can be used to enhance footography photos. For example, use textured fabrics, flowers, or shoes to add interest to your foot shots. This is especially effective in fashion or advertising-focused footography.
Editing and Post-Processing Tips
Once you’ve captured your foot photos, post-processing is where you can refine and enhance your images. Here are some essential editing tips:
1. Skin Retouching
Use photo editing software like Adobe Lightroom or Photoshop to smooth out any imperfections in the skin, such as calluses or blemishes. If you’re looking to make adjustments to the skin tone, you can also consider using a change skin color app to subtly adjust the hue and texture of the skin for a more polished look. However, be careful not to over-edit—natural texture is key to great footography.
2. Adjusting Contrast and Brightness
Increase contrast to make the feet pop against the background. Adjust the brightness to highlight key features like the arches, toes, or heels, ensuring they stand out.
3. Color Grading
Use color grading to set the mood of your foot photos. Cool tones can give a more serene, calm vibe, while warm tones can make the image feel more energetic and inviting.
Footography in Fashion and Advertising
Footography has become a popular tool in fashion and advertising campaigns. Brands often focus on shoes, pedicures, or accessories in their ads, and a beautifully captured foot shot can highlight these products. For example, brands like Nike or Adidas use foot-focused shots in their footwear campaigns to showcase their products in action. Similarly, foot photography is also prevalent in the beauty and wellness industry, with brands promoting foot care products or pedicure services.
Common Mistakes to Avoid in Footography
While footography can be a fun and creative niche, there are some common mistakes to watch out for:
1. Poor Lighting
Footography requires careful attention to lighting. Too much direct light can create harsh shadows, while too little light can result in grainy or blurry photos. Always ensure your lighting is balanced to create the best results.
2. Unflattering Angles
Avoid taking photos that distort the natural shape of the feet. Make sure the feet are positioned naturally and avoid awkward angles that make them appear disproportionate.
3. Not Paying Attention to Details
The beauty of footography lies in the details. Pay close attention to the texture of the feet, nails, and skin, and make sure your focus is sharp enough to highlight these details.
Conclusion
Footography is an exciting and dynamic niche in the world of photography, offering endless creative possibilities. By mastering the right techniques, experimenting with lighting and angles, and paying attention to the smallest details, you can create stunning and unique foot photos. Whether you’re a professional photographer or just starting, footography provides an opportunity to showcase your artistic vision in a fun and rewarding way. So grab your camera, explore different poses, and start capturing the beauty of feet through your lens!
FAQs
1. What is footography?
Footography is the art of photographing feet, often focusing on details like arches, toes, and soles in a creative and artistic way.
2. What equipment do I need for foot photography?
For foot photography, a DSLR or mirrorless camera, a macro lens, and good lighting (natural or artificial) are essential. A tripod is also useful for steady shots.
3. How do I create the best poses for foot photography?
Experiment with different foot angles, close-ups, and symmetrical poses. You can also capture feet in motion or use relaxed, natural poses for a more organic look.
4. What are the best lighting techniques for foot photography?
Natural light is great for soft, flattering shots. You can also use diffused artificial lighting or backlighting for dramatic, high-contrast images.
5. Can foot photography be used in advertising or fashion?
Yes, foot photography is widely used in fashion and advertising to showcase shoes, accessories, and foot care products in campaigns.